
Six most important improvements in WBPP 2.0
Calibrating images with dark, bias and flat frames can be a daunting task. To make things easier, PixInsight provides a script called WeightedBatchPreProcessing (WBPP). This script automates most of the work. But with automation comes less customization. So in some cases you still have to rely on manual calibration steps or multiple runs of the automatic script. Also automation makes it a bit of a black box and if you don’t know exactly what you’re doing, you can end up with the wrong results.
Recently version 2 of WBPP was released, a major update which addresses both the issue of customisation and transparency. In this blog the more important improvements are highlighted.
Control Panel
Next to the tabs for Bias, Dark, Flat and Lights, an extra tab is added, called ‘Control Panel’. Here is an overview of all the subsets of images, logically grouped and with detailed information on how each subset will be processed. Green ticks indicate all relevant calibration frames are available. A red circle indicates a process is not selected. And yellow triangles show that something needs attention. When you highlight a line-item, all related line-items will highlight in green (or blue).
For each line-item you can select if it needs to be calibrated with a Dark, Flat or Optimized Dark. Also you can indicate whether frames are monochrome or colour, and the applicable Bayer-pattern can be selected if that is not properly done by WBPP.
The new Control Panel provides a comprehensive overview of all the planned calibration steps
This Control Panel is a major improvement over the previous Diagnostics button. That button is still available, but when using the Control Panel properly that Diagnostics button should not tell you anything new.
Calibration Diagrams
In the Control Panel is a button called ‘Show Calibration Diagram’. Clicking this button brings up a graphical representation of the calibration steps that are planned for the highlighted line-item. For less experienced users this helps understanding what actually is happening behind the scenes. For more advanced users this is yet another way to ensure that the desired calibration is applied, also if less standard approaches are used.
Flow Diagrams are a new tool in WBPP to graphically represent the calibration steps planned for each set of images
Saving settings
One annoying behaviour of the old WBPP was that once you were working with it you’d have to go on until finished. Should you wish to come back and do the same with one different setting, you’d have to start all over again. This was in particular an issue because WBPP is a script and PixInsight is pretty much locked-up as long as you have the script open. So once you were running it, there was no way to check an image, have a look at its fits-header, analyse the statistics, etc.
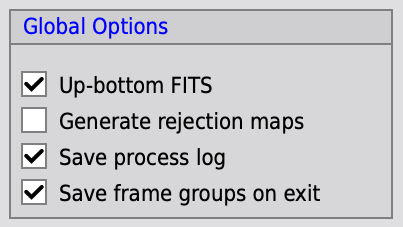
While that locked-up behaviour is still there (that is how PixInsight handles scripts), you can now easily leave the script, as long as you keep the option ‘Save frame groups on exit’ checked. Next time you open the script you come back exactly where you left it.
Exit the script and come back just where you left it
Grouping Keywords
WBPP usually groups images by exposure, filter, binning, etc. And for many situations that is sufficient. But sometimes you want to apply different calibrations to different sets of data based on a custom grouping. In my case for example, I take narrow-band flats at a higher gain than the lights, just to reduce the exposure time of those flats. But it means they need to be calibrated using different bias-frames than the light frames. The usual way to go about this is to run the script twice. Once just calibrating the flats, and a second time to calibrate the rest, using the master-flats from the first round.
Now you can address all those situations by running the script just once by using the Grouping Keywords function. It allows you to define extra ‘Keys’ by which you group the frames. The easiest way is to use any ‘Name’ from the FITS-header. In the situation mentioned above, the dataset is grouped based on GAIN, a regular Name in the FITS-header.
Grouping the frames based on Keys is a powerful tool to apply custom calibrations to subsets of images.
Flats with gain 300 can now be calibrated with Bias-frames of gain 300, while the light images can be calibrated with Bias-frames of gain 100. All within one run of the script. Other examples are if sessions took place on different dates and you would want to apply the appropriate flats to them, or you may have recorded at different temperatures, etc. etc.
If the FITS-header does not contain the information based on which you want to group, you can also add grouping to the filename. Simply separating the key and its value by underscores. So filenames that would contain ’SESSION_12FEB_’ and ‘SESSION_13FEB’, can be grouped based on the Key ‘SESSION’. And in this example there would be two groups, one with value 12FEB and one with value 13FEB.
Manual Override
In most cases, WBPP 2.0 does a pretty good job in figuring out which calibration frames are to be applied to which light frames. Under Calibration Settings just select ‘Auto’. But sometimes the script can get a bit lost. Especially when you’re using Grouped Keywords the automatic selections may not always be the correct one. Then it is good to know that there is always a manual override. You can actually instruct WBPP exactly for each line-item which calibration frames to use. The green tick is now replaced by a blue chain, and the reference calibration frames are indicated by highlighting in blue rather than green text.

If WBPP selects makes the wrong selections, you can always manually override.
Automatic File recognition and custom adjustments
In the WBPP script there are two ways to add frames. One is to select which type of frame you’d like to add (e.g. ‘Add Bias’). The other way is to select ‘Add Files’ and let WBPP figure out which file is what type. Until now WBPP used information in the FITS-header for that. But not every capture program writes that information consistently, and images from DSLR cameras dont have FITS-headers, so you would have to add those manually in their respective sections anyway. Version 2 of WBPP now also checks the filename and even the file directory where the frames are located. If either of those have for example the term ‘Dark’ in them, the corresponding files will be added to the appropriate section.
This is something to be careful about though. For example if you want to load a set of frames that have ‘DarkFlat’ in their filename, dont be surprised if they end up in the Flat section, while they are most likely Darks.
If you want to add files that dont have the proper information in their FITS-header or filename, but you do want them to group correctly in WBPP, you can now also add Custom Frames. It allows ‘hard-coding’ the settings ‘type’, ‘filter’, ‘binning’ and ‘exposure’. If you need more advanced grouping, you would have to add the info to the filename, but for many situations these four keys would be sufficient.

As a last resort you can always manually define key attributes of files so that they are allocated to the right calibration process.
If you find yourself renaming files a lot, either for custom grouping, or for automatic recognition of file types, you may want to invest in a proper renaming tool. For MacOS the app Better Rename comes highly recommended.
Room for improvement
As great as a tool WBPP is, there is always room for improvement. In the previous version you could highlight an individual frame to be a Master-frame. That selection-option has disappeared. The only way to add a master-frame to the set is to call it somewhere in the filename or directory ‘Master’. Probably a good habit would be to always put your master files in a ‘Master’-folder. Nevertheless, it is not clear why the checkbox disappeared as sometimes it may just be handy to tick the box, rather than move or rename the file.
The ‘Save frame groups on exit’ is a great addition. And as long as you keep working on the same dataset this goes well. Even masters created by the script will be added to the list. But as soon as you start working on a different dataset, you will do a reset of the tool and you loose the information after all. It would be great if the saving on exit could become a ‘Save as..’ function. That way you could simultaneously work on different datasets and switch by simply loading the corresponding scripts.
To add files, you still have to select the individual files. I have a tendency to keep my files in separated directories based on file-type and filter. Looking at all the automation applied, it would be awesome if you could point WBPP to a directory and it would extract all files from all sub-directories.
Conclusion
The WeightedBatchPreProcessing script has evolved to version 2.0, which is a massive upgrade from version 1. The amount of customisation has dramatically increased and allows for a single run on even the most complex of datasets. And it has done so with retaining and even improving the transparency of the processes applied. It is a joy to work with and keeps you in full control over the process. With this script it would be hard to find situations where manual calibration would be needed or preferred.
For a more in-depth look into WBPP 2.0, you may want to check out the training provided by Adam Block. He has released a new set of videos on how WBPP 2.0 works and how the new functionality can be used to deal with even the most complex of datasets, and it is completely free of charge.