
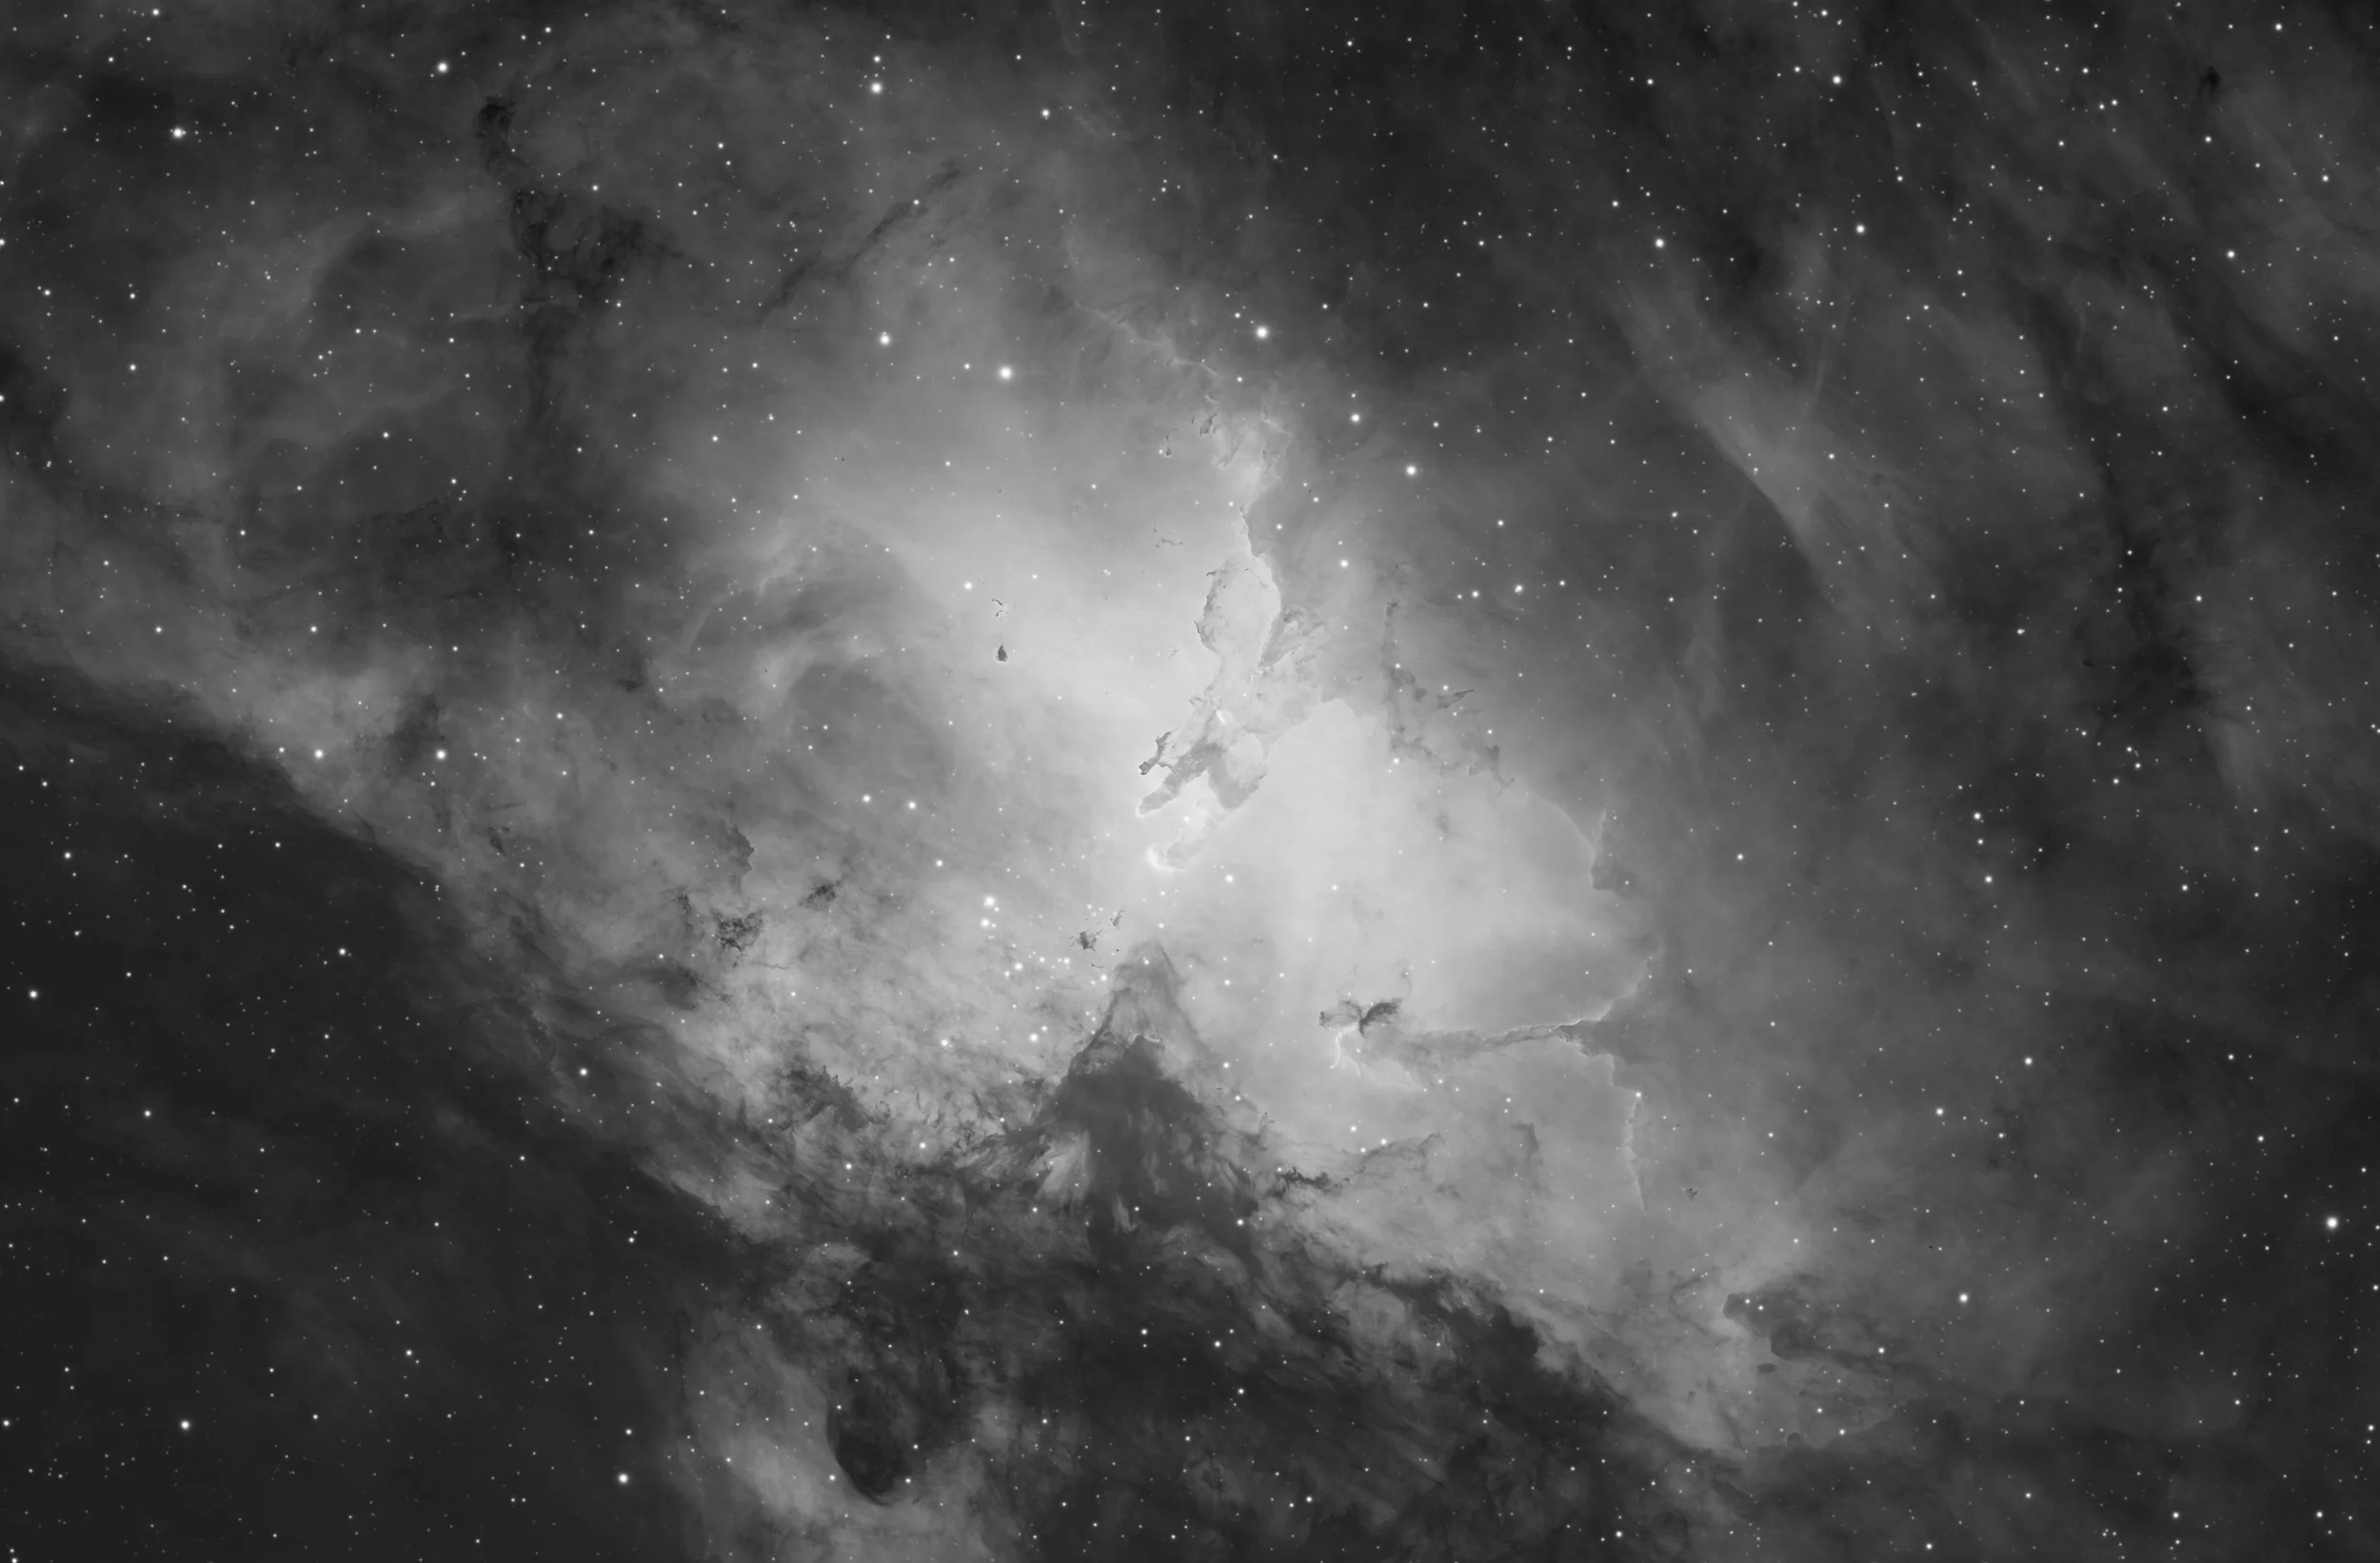
M16 | Sh2-49
M16 | Sh2-49, Pillars of Creations - Click here for full resolution
M16, also called the Eagle Nebula or the Star Queen Nebula is a young open cluster of stars in the constellation Serpens, discovered by Jean-Philippe de Cheseaux in 1745-46. Both the “Eagle” and the “Star Queen” refer to visual impressions of the dark silhouette near the center of the nebula, an area made famous as the “Pillars of Creation” imaged by the Hubble Space Telescope. The nebula contains several active star-forming gas and dust regions, including the aforementioned Pillars of Creation. The Eagle Nebula lies in the Sagittarius Arm of the Milky Way and part of a diffuse emission nebula, or HII region. As such the nebula is also part of the Sharpless catalogue, under number Sh2-49.
source: Wikipedia
NGC/IC:
Other Names:
Object:
Constellation:
R.A.:
Dec:
Transit date:
Transit Alt:
NGC6611, IC4703
Eagle Nebula, Sh2-49, Pillars of Creation, Star Queen Nebula
Open Cluster, Emission Nebula
Serpens
18h 18m 48s
-13° 48.4′
29 July
39º S
Conditions
M16 is a tricky object to photograph from the northern hemisphere, as its declination of -13° never brings it high above the horizon. Best time is July/August where it reaches maximum altitudes between 30-40°. M16 was photographed over 19 nights during July and early August 2024 from the remote observatory at IC Astronomy in Oria, Spain.
Equipment
The default rig at the observatory was used. The core of this rig is a Planewave CDK-14 telescope on a 10Micron GM2000 mount, coupled to a Moravian C3-61000 Pro full-frame camera. The RoboTarget module in Voyager Advanced automated the process to find optimal time-slots during astronomical night.
Telescope
Mount
Camera
Filters
Guiding
Accessoires
Software
Planewave CDK14, Optec Gemini Rotating focuser
10Micron GM2000HPS, custom pier
Moravian C3-61000 Pro, cooled to -10 ºC
Chroma 2” H-alpha, SII, OIII (all 3nm) and Red, Green and Blue unmounted, Moravian filterwheel L, 7-position
Unguided
Compulab Tensor I-22, Windows 11, Dragonfly, Pegasus Ultimate Powerbox v2
Voyager Advanced, Viking, Mountwizzard4, Astroplanner, PixInsight 1.8.9-3
Imaging
M16 can be very well imaged in both broadband as well as narrowband. In this case the choice was made for narrowband. The field of view resulted in a detailed representation of the Pillars of Creation, rather than the full Eagle Nebula. The full Eagle Nebula was shot a year earlier on a wide-field setup in broadband. Details of that image can be found here. For the current image, narrowband Images were shot using 10 min exposures each. For the stars, quick 3m RGB images were shot. Because the target was often low at the horizon, a high rejection rate was expected. And because the intent was really to get a long exposure on this target to bring out as much detail as possible, the final image contains almost 40h worth of data.
Resolution (original)
Focal length
Pixel size
Resolution
Field of View (original)
Image center
9576 × 6388 px (61 MP)
2585 mm @ f/7.3
3.8 µm
0.30 arcsec/px
48' x 32'
RA: 20h 22m 55.208s
Dec: +40° 48’ 33.45”
Processing
The processing was kept very similar to the processing of NGC6910. All images were calibrated using Darks (50), Flats (25) and Flat-Darks, registered and integrated using both the WeightedBatchPreProcessing (WBPP) and the FastBatchPreProcessing (FBPP) script in PixInsight.
Comparison WBPP versus FBPP
WBPP is the script I have used for many years. FBPP is a fairly new script which I’ve used in recent images. It runs really fast, but has less features. The idea is that if you have a large enough and good enough dataset, FBPP should get you there 99% in a fraction of the time. I took this opportunity to compare the results.

WBPP in full form takes 1h30m to complete and rejects 2 frames.

FBPP finished much faster and completes in only 10m. It does not reject any frames, suggesting a more forgiving weighting scheme.
The execution monitor windows of both scripts (see above) clearly indicate the huge time difference. WBPP took 1h30m to complete the whole dataset, including the local normalisation process. FBPP on the other hand was ready in 10 minutes and that was with PSF SNR weighting on. That is a 90% speed bump! Obviously, FBPP does less things. For example, local normalisation is not performed. And if you don’t have varying gradients in your dataset, this may be perfectly ok. It also measured only 30 out of 251 frames, while WBPP analysed all of them. And in doing so, WBPP decided that 2 frames had to be rejected. To be honest, I don’t know much about the exact differences in calculations that are made here behind the screen. It does seem that WBPP is more thorough and restrictive, but at a huge time cost. More important however is the outcome in terms of image quality.

The WBPP version is flatter, leaving more room for processing
FBPP version has more contrast, but less dynamic range to process
The images above are the Ha output images of both WBPP (left) and FBPP (right), both with the regular STF stretch applied. What is apparent immediately is that the WBPP image is much flatter, while the FBPP image shows much more contrast. This was partly due to a slightly different STF stretch, but in general the WBPP image being a generally flatter image, was easier to stretch and bring out detail where needed, while the FBPP was a bit more of a challenge to capture the full dynamic range without blowing out the highlights, or loosing darker areas into the black. I also had the impression, that on close inspection, the detail in the WBPP images was slightly better than in the FBPP. But the differences were small and one would be hard-pressed to pick up these differences in a blind comparison. It has to be said that the Ha image showed the biggest differences. The SII and OIII images seemed to be more similar between the different methods.
In conclusion, I would say that with a decent dataset, FBPP can give remarkable results in just a fraction of the processing time. But the fact that differences can be seen, and for some images WBPP provides easier to work with images, makes me probably gravitate back towards WBPP again. The time gain is somewhat irrelevant as in neither case you stay waiting for it and you’ll be doing other things. And 1.5h for a set of 250 full frame images is perfectly manageable in that respect. Besides, you have more flexibility in fine-tuning the behaviour of the script.
For the rest, the processing was pretty standard. Gradients were removed per channel (GraXpert), deconvolved (BXT) and converted into starless images (narrowband stars to be discarded). When putting them together in the Hubble Palette (ChannelCombination) applied the NarrowbandNormalization tool. Lightness was set to preserve, and OIII was given a little boost. But as sometimes seen before, when you boost the OIII, some mild magenta areas may emerge. These were removed by inverting the image, apply SCNR and invert the image back again. Contrast and saturation were enhanced (CurvesTransformation) and further structural details were enhanced using two runs of LocalHistogramEqualization, once at pixelradius of 300px for the larger structures, and once at 60px for the smaller structures. This tool always needs to be applied with care, and I typically dial in the amount somewhere between 0.1 and 0.2. The image looked almost noise-free, a benefit from the long exposure for sure. But still a little bit of noise reduction (NXT) was applied to give just that tiny bit of extra smoothness to the image.
For the stars, the broadband images were gradient corrected (GraXpert), deconvolved (BXT) and stars extracted (SXT). The star-images were put together (ChannelCombination) and stretched using StarStretch (SetiAstro) at default settings.
The stars were added to the SHO images using the CombineImages script from the toolbox that comes with GraXpert. The background was adjusted (backgroundneutralization) to align with other images. Finally the image was rotated to have the pillars standing up instead of hanging down, and a further crop was made to highlight the pillars a bit at the cost of some nebulosity of the eagle nebula.
Processing workflow (click to enlarge)
This image has been published on Astrobin and received Top Pick Nomination status.