
Creating Horizon files made easy. Astroplanner example

Many software packages that are used to plan an imaging session have an option to create an artificial horizon for the observation location. It provides a quick way to see if and when targets disappear behind a tree, house or other obstacle. In some cases (SkySafari, KStars, Stellarium) a 360 degree photo of the horizon can be loaded as a rectilinear image. It gives a good qualitative impression of the limits of the horizon. Other software (Astroplanner, MountWizzard, KStars) require or allow a more quantitative method to define a horizon. A text-file with Azimuth/Altitude combinations of the horizon is typically used for that. In an earlier blog-post I wrote how to measure the altitude for a variety of azimuth positions using a combination of default screen recording on an iPhone and the SkySafari app.
Recently I found a video from Emerald Hills Skies describing the use of a smartphone app to automate this process and with a lot more precision. The app used is Theodolite. Upon opening the app, the only thing you need to do is to point north, place the crosshair on the visible horizon-line and press the Add Data button. Slowly turn around on the spot, while following the horizon profile and keep tapping the Add Data button. Go around 360 degrees, keep tapping and it is easy to have 50 or 100 datapoints describing a very precise horizon profile.
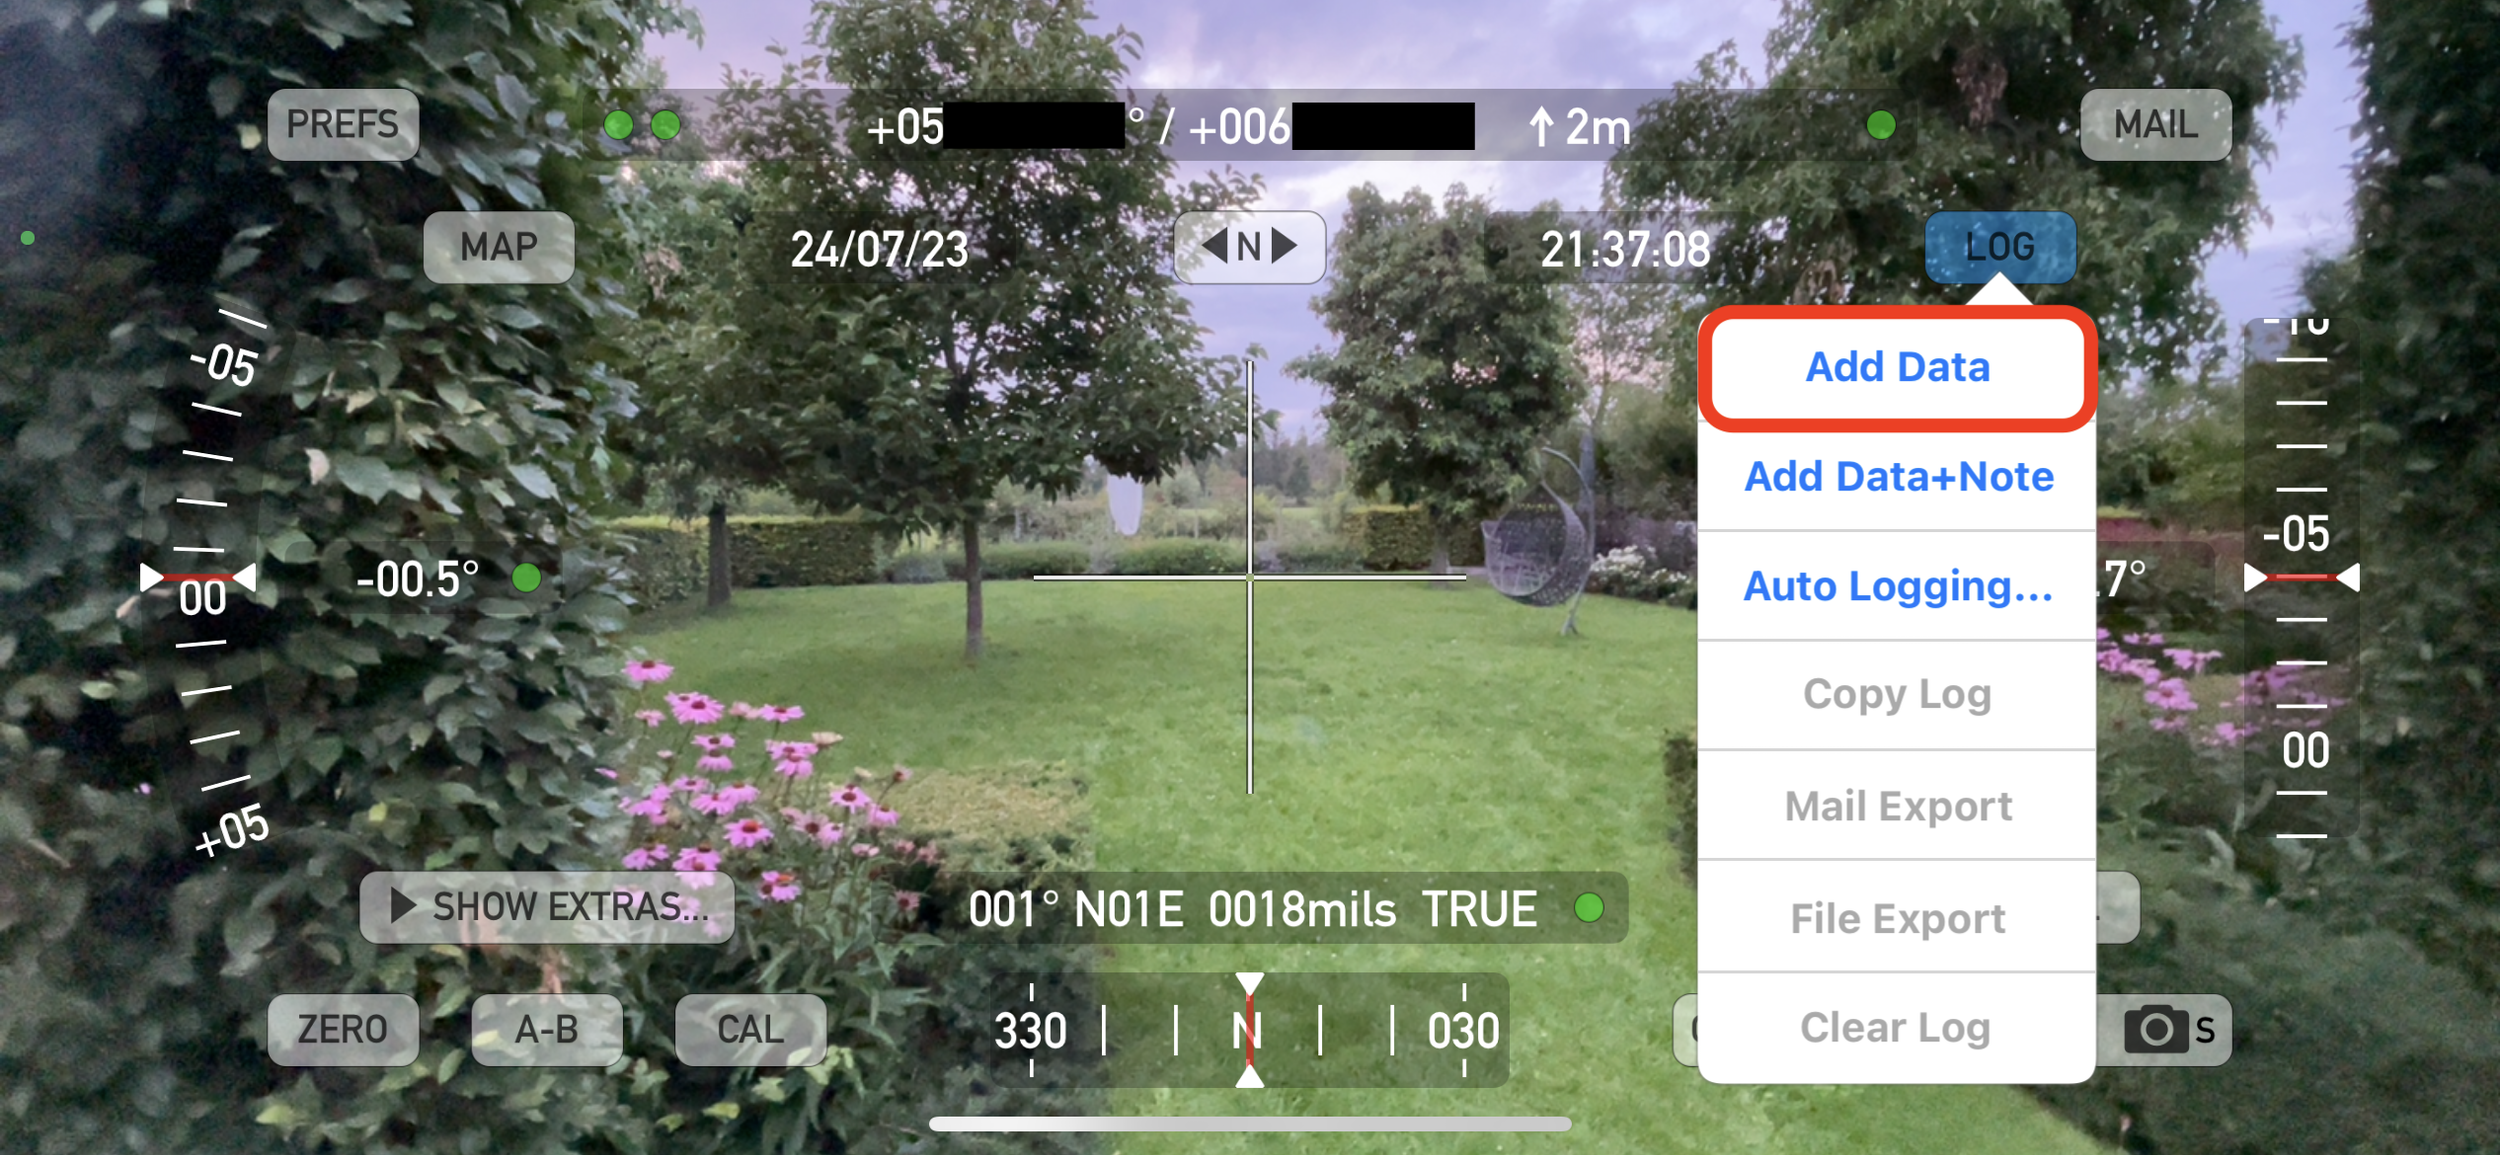
Once complete, tap either Mail Export or File Export to send the information to yourself. File Export can place a csv-file on your iPhone or iCloud. Email Export will send you a complex looking email with a csv-file as attachment.
Astroplanner
From here the process will be a bit different depending on which software you want the horizon-file to load into. Here the example is given for Astroplanner. Open the csv-file in Excel and rename the following columns:
Rename HDG_DEG into Azimuth
Rename VERT into Lower
Remove all other columns, they are not necessary. Now make sure the first value has an Azimuth of 0 and the last value has an Azimuth of 360. Export the document as a csv-file again. There are two things to take care of. The delimiter in the final file needs to be a comma. Sometimes Excel puts a semicolon in there. If that is the case, just open the csv-file with a text editor and replace all semicolons into commas. The second thing to look out for is the decimal point. This needs to be the same as used by the computer operating system. Again, if there are comma’s where there should be points, correct this with a replace all action.
In Astroplanner go to Edit > Resources and select the site for which you just created a horizon file. Right-click on the image and load the csv-file. Upon closing this menu, the visibility widgets should now show the horizon profile as applicable for your target. Keep in mind that these are dynamic horizon profiles. Depending on the target selected, they will change. That is because the green bars indicate the horizon at the specific point where the target is located throughout the night and year.

In the visibility column of the Objects list, there now is an extra possible value. Besides the regular blank and ‘Yes’ options, there is now also a ‘Horz’ option. This means that the target is above the ground, but behind an obstacle in the local horizon.
Horizon files are sometimes a bit of a hazzle to make, but they are worth the effort. Once they’re in place, they offer a lot of benefits in carefully planning your imaging session. Anything to make it a bit easier to make these files is worth looking at it. And this semi-automated method using the Theodolite app is certainly making things easier.