
Sh2-190 - Heart and Soul Nebulae
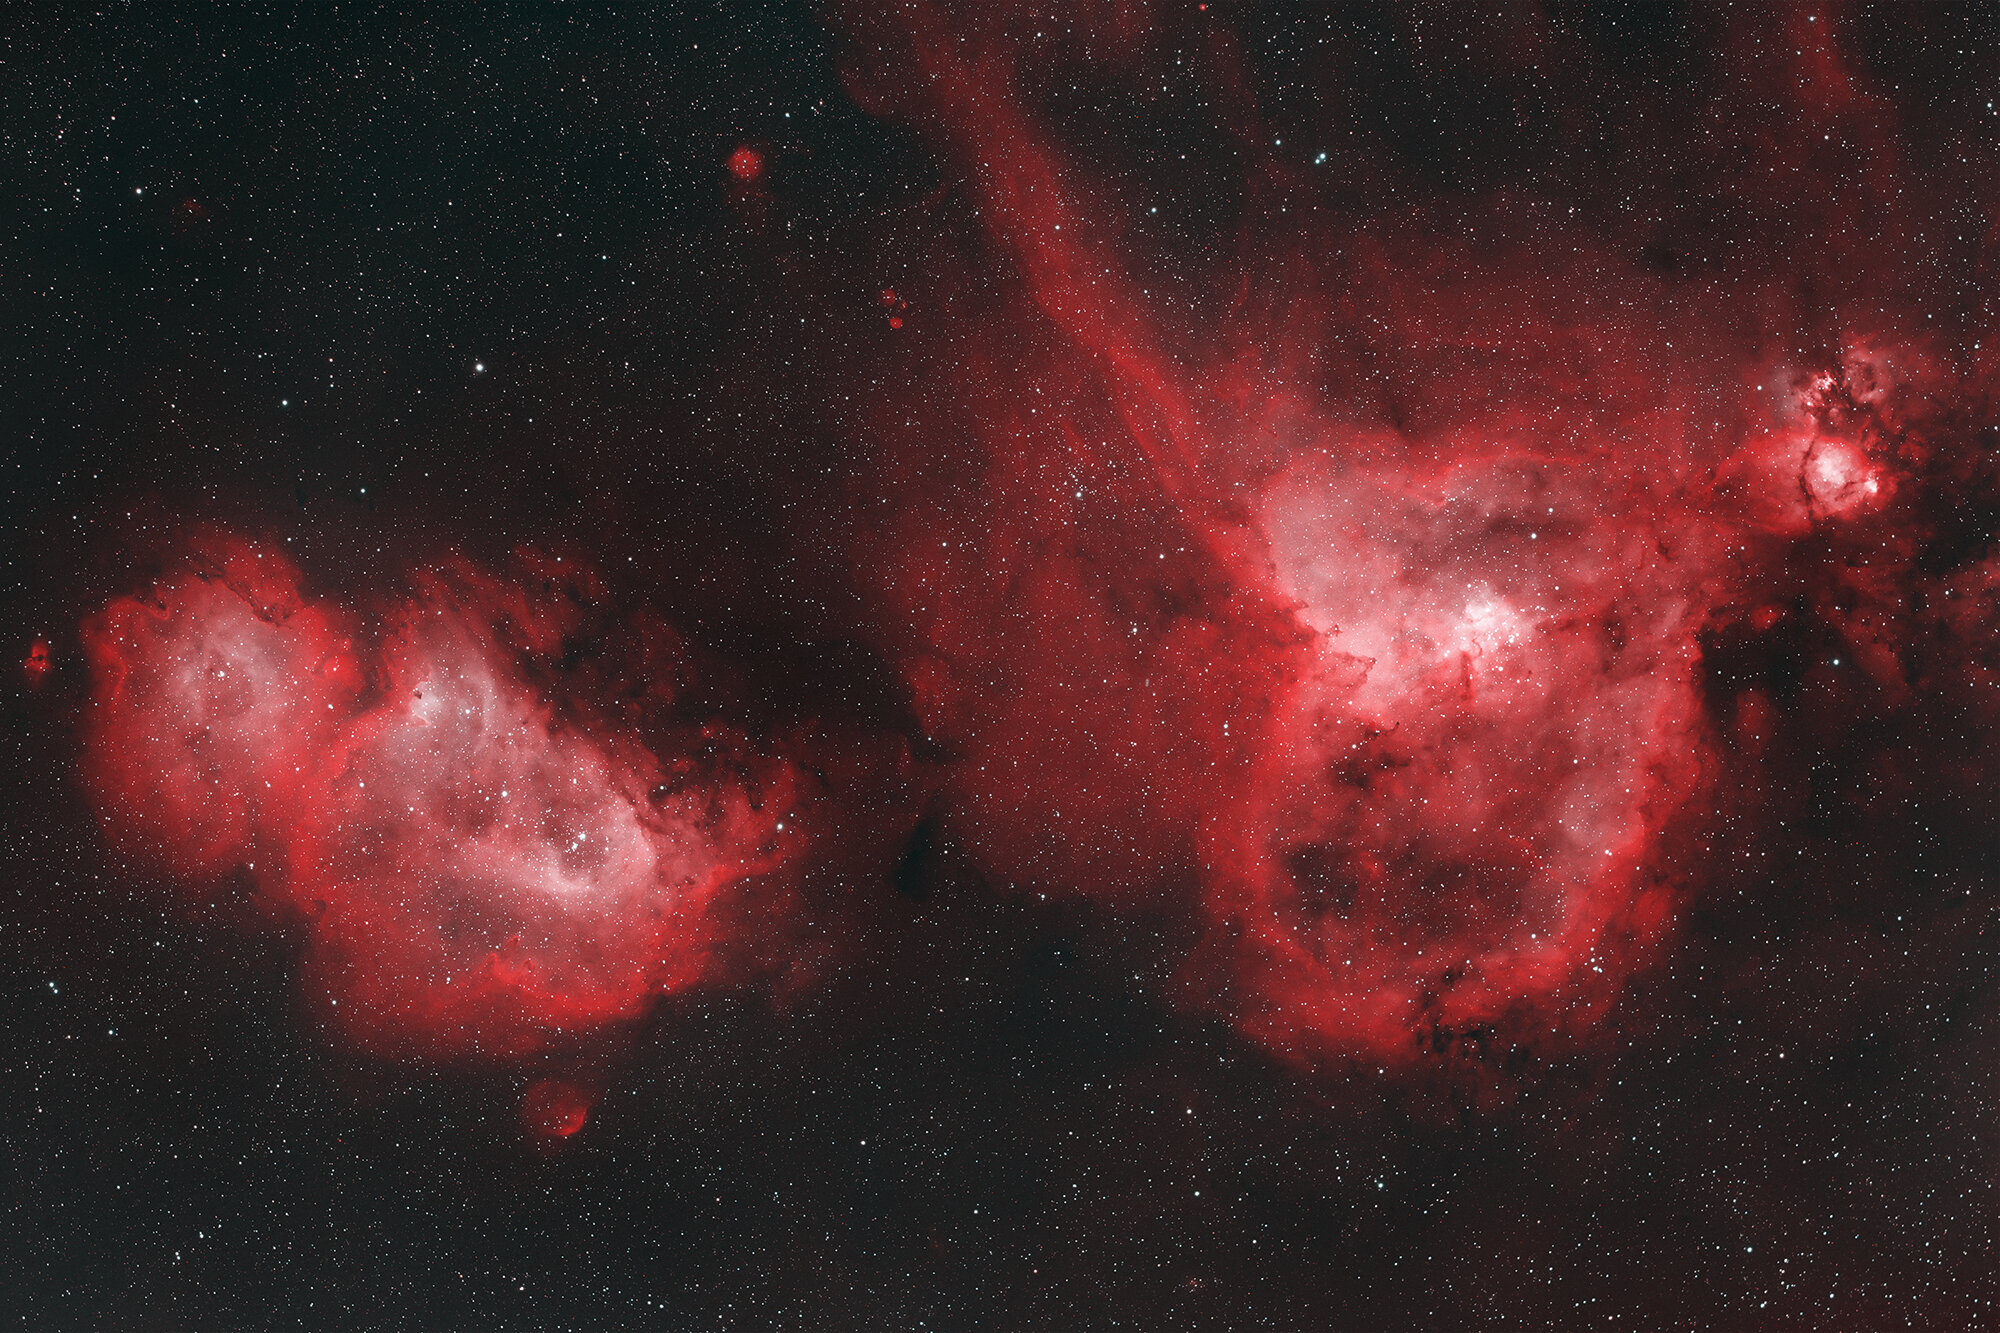
IC1848 - The Heart and Soul Nebulae - Click image for full resolution
IC1848 (R.A.: 2h 52m 57.8s, Dec: +60º 30’ 16.4”) is a cluster in the constellation of Cassiopeia at a distance of 6,500 lightyears from Earth. The cluster is usually associated with the Soul Nebula, also known as Sh2-199 and LBN-667. Other clusters in the Soul Nebula are Cr34 and Cr632. Next to the Soul Nebula is another open cluster, IC1805. Also this cluster is located within a large area of nebulosity, the Heart Nebula, Sh2-190. At a distance of 7,500 lightyears from Earth, it is slightly further away. Both nebulae are located in the Perseus arm of our Milky Way galaxy. The Heart nebula is also known for its large radio source W5.
Both nebulae make for great individual astrophotography targets, but together they are also well known as Heart and Soul Nebulae.
Sky Plot (click to enlarge)
10º FoV + scope display (click to enlarge)
Planning
The Heart and Soul nebulae are circumpolar targets, so can be photographed all year around. Best timing is in the October-December timeframe. The target was chosen to test out a new focal reducer for the FSQ-106. This reducer, together with the ASI6200 creates a very wide Field of View of 5.42 degrees. The combined heart and soul nebulae were a perfect fit for this new wide-field setup. As a result, the images were shot a bit later in the year, in March.
During this time, also reports appeared about a supernova in Cassiopeia. The same session was used to capture this phenomenon as well. Details can be found in this blog-post.

Visibility charts showing altitude at 22:00h throughout the year (left) and throughout the session on March 29, 2021 (right).
Conditions
All images were taken from the backyard in Groningen, The Netherlands (53.18, 6.54), divided over 2 consecutive nights: March 29 and 30, 2021. There was a near full moon, so not the most ideal of circumstances. Using 3nm H-alpha and OIII narrow-band filters, proper frames could be collected. The moon effect could clearly be seen from the SQM values. Normally these can be in the 19’s, sometimes low 20. These two days, the SQM values stayed in the 18’s.

Capturing
The image was captured using the Takahashi FSQ-106 in combination with the ASI6200MM-Pro camera. To widen the field, a new focal reducer was added to the setup, the Takahashi 645 super reducer. This reducer applies a 0.72x magnification factor, creating a 380mm f/3.6 telescope. There are multiple focal reducers available for the FSQ-106, but this one has the largest image circle of 60mm. It is a big chunk of glass (792g) that is screwed deep inside the focuser. With the Camera rotator in place there is only just enough grip to get the reducer in.
The image was a test object to evaluate the reducer. One thing became clear very quickly. The fast scope in combination with the large sensor of the full-frame camera demanded a lot more precise focusing. So far, the default Ekos method of single star focusing was applied, but in one occasion that resulted in the focus being pretty off because a star at the edge of the frame was chosen. Since then the default focusing method was changed to full-field focusing, with the field limited to a 60% coverage of the frame.
The recently installed Camera Tilting Unit certainly proved its worth. But even with the CTU, there were some artefacts around the edges of the frame. Some slight out of focus areas, and other areas where some coma was visible. Perhaps further fine-tuning the CTU might enhance the final results, but also with current settings the artefacts were small enough to still create very nice images.
The Super Reducer is screwed inside the focuser tube of the FSQ-106. With the CTU added to the imaging train, some spacers were needed to achieve the required 90.4mm of back focus.
Technical Details
Telescope
Mount
Camera
Filters
Accessoires
Software
Takahashi FSQ-106 + 645 Super Reducer 0.72x, Sesto Senso
10Micron GM1000HPS, Berlebach Planet
ZWO ASI6200MM Pro, cooled to -15 ºC
Chroma 2” H-alpha (3nm) and OIII (3nm) unmounted, ZWO EFW 7-position
Fitlet2 (Linux Mint 20.04), Pegasus Ultimate Powerbox v2, Flip Flat
KStars/Ekos, INDI Library, Mountwizzard4, SkySafari, openweathermap.org
Frames
Some time ago, the heart nebula was photographed in the Hubble (SHO) palette. For this image a different palette was chosen, using only H-alpha and OIII narrow-band filters (3nm). HOO images usually show up pretty red, with the Oxygen areas lighting up bright and nice.
The H-alpha signal was very strong and with the fast telescope, 3min subs were more than sufficient to collect enough detail. The OIII signal was very weak though, so the exposure was prolonged to 5min subs. Still individual images did not show much detail. It was not until the stack was made that the OIII signal was well visible in the cores of the nebulae.
Over the two sessions, quite a lot of frames were lost. An attempt to do an automated meridian flip failed, the ‘load and slew’ option did not work well in one instance, a focusing error because a single off-center star was used were some of the issues encountered. Below are the frames listed taken in each session that made it to the final image.

Image
In total 7.5h of exposure was collected, with slightly more H-alpha than OIII exposure. With the fast scope this exposure can already give some very decent results. The field of view of just over 5 degrees was enough to capture both nebulae in their full detail. The camera was rotated to place the nebulae side by side. The GOTO function was a bit difficult, because in order to capture both nebulae, as the center between the two nebulae was targeted. This was solved by manually positioning the telescope to capture both targets. A reference frame was shot that was used in subsequent sessions to position the telescope exactly in that right spot again.

After a little crop to straighten the edges, the final image has a resolution of 9298 x 6132 pixels, or 56.4 Megapixels. It covers a field of view of 5.2 degrees horizontally. The pixel scale of this combination is a bit under-sampled, but at 2 arcsec/px still within acceptable range. The large pixel-count helps to not experience any under-sampling under regular viewing conditions.
Annotated image showing other deep sky objects, stars brighter than mag. 9 and the image’s orientation.
Processing
All frames were calibrated with Bias (100), Dark (50) and Flat (25) frames, registered and stacked using the WeighedBatchPreprocessing script.
A previous image of the Heart Nebula was processed using the Hubble Palette (SHO). For this image, the goal was to make it an intens red cloud of Hydrogen-alpha with bright cores emitted in OIII. So the colour palette used was HOO. The focus was on getting some experience with the new reducer, and no RGB-data were collected. In hind-sight some additional RGB data would have made the star colours a bit more natural and pleasing.
The start of the processing was fairly standard, with a Dynamic Background Extraction, followed by noise reduction per channel, using the MMT-method. The OIII signal was quite a bit stronger than the H-alpha, so LinearFit was used to bring them in line. In the Channel Combination process, H-alpha was mapped to the Red channel and OIII was mapped to both the Green and Blue channel. At this point the image was stretched using a series of manual Histogram Transformations. The traditional method is to apply ScreenTransferFunction and use that outcome for HT. But often this can lead to exaggerated noise-patterns, overblown highlights, etc. More and more the preferred method is to just manually apply a series of three or four Histogram Transformations, carefully only just clipping the blacks, bringing the peak of the histogram to about the 25%-line and occasionally stretch different colour channels slightly differently.
Even the Linear Fit and manual stretching could not prevent that there was quite a bit of green in the background. When correcting that, there is a risk that the overall colour balance changes. So it is important to mask the objects. This can be done by using a luminance mask, but that does not protect the darker areas in the nebulas. Instead, in this case, a mask was created using the GAME script. Two ellipses were drawn over the nebulae to create the mask, which was then applied to the image and inverted. This gave a lot of freedom to alter the background colour using Curves Transformation.
One of the advantages of an HOO image is that you have the option to really let the OIII regions shine, creating a more dynamic image. To enhance that effect, a Luminance Mask was created from the OIII image and using that mask, the OIII regions were brightened using Curves Transformation.
Next up were the stars. The focus of the image are the nebulae and the stars were a bit too dominant in the image. To enhance focus on the nebulae, stars were shrunk a little bit using the Erosion function in Morphological Transformation. Best is to do this while protecting the nebulae by applying a star mask. The colours of the stars in an HOO image is not very natural. Either they come out bright red, or white, and towards the edges optical aberrations lead to red ‘shadows’ next to white stars. The best option here is to take some RGB images and apply star colour from those. But no RGB-frames were shot in this case. To reduce the artefact of the star redness, the ColorSaturation tool was used to selectively reduce the saturation in red. A star mask alone was not sufficient enough, as stars within the (red) nebula would get a dark halo around them from the desaturated red. So the star mask was combined with the nebulae mask, used earlier to reduce the background. This way only stars around the nebulae were affected.
Sharpening is not something that is usually applied. It often increases noise and can create some unnatural looking images. In a recently discovered report, a technique was published to deal with this. Essentially it would apply two sharpening techniques, one using MultiscaleLinearTransform and the other using UnsharpMask. In PixelMath the original image was then combined with the two sharpened images using a 1/3 contribution of each image. This was applied here. The effects were really subtle and for it to properly work probably a lot more fine-tuning of parameters should happen. In this case it was decided that sharpness was good enough. Through the sharpening the stars had become a bit brighter again, so another subtle round of star shrinking was applied.
Now it was time for the finishing touch. The red was very red, so the overall image was toned down a bit in saturation. Furthermore contrast was enhanced a bit to make the image a bit brighter. Finally in Photoshop some dodging and burning was done to further enhance the nebulae against their dark background.
Processing workflow (click to enlarge)
Conclusion
Part of this image was to test the reducer on the FSQ-106. The test worked out successful. The extra field of view is a very welcome addition to using the telescope for wide-field images. In the corners, there are some small optical artefacts, but nothing too distracting. There are not many single objects that require this wide field of view, but for the few that exist, this is a lot easier than making mosaics. Also photographing regions with multiple smaller objects in them would make nice targets for this setup.
Using the HOO colour palette turned out well. It is a welcome alternative to the Hubble palette for narrow-band imaging. But some RGB images for star colour would go a long way to make the overall image more pleasing.
This image has been published on Astrobin.